While Sparda changes very slightly in each of the games that it's shown in there are very few quality reference pictures so the most well know of the bunch was chosen as the base to work from.
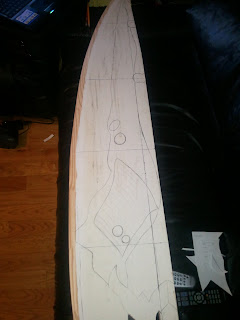
Since I don't have access to a large enough printer to create full scale blue prints I went free hand and sketched out a rough drawing of the profile on some scrap plywood.
Unfortunately, though a bit expected the thin wood wasn't strong enough to support the weight and this template ended up snapping at the hilt. From there I redrew and cut another profile from a thicker 1x12 board and quickly shaped an edge on the belt sander.
Here's a height comparison with my girlfriend, Stephanie/Pink_Panda, holding the new profile and my nearly complete Rebellion.
From here I drew out where I would be adding foam to build up the fleshy accents and other parts of the sword.
Blue insulation foam was cut to shape for the large fleshy side pieces, Great Stuff expanding foam spray was used to build a basic shape for the spine of the blade. The expanding foam was then carved to a more bone like shape with a razor knife.
Several layers of Durhams Rock Hard Putty, a water based putty was then added to cover the expanding foam in order to both seal and give it a more bone like texture. Something that is very difficult to simulate with paint.
After a bit of sanding I had something like this.
After drawing out some accent marks in the "juicy bits" I grabbed some sandpaper and 'carved' in the designs. Insulation foam sands very easily, this is one of the main benefits to working with it.
The other side of the hilt guard was then cut from some scrap that was left over from the blade profile and then sandwiched between two more hilt guard profiles. The profiles were then carved with a dremel router to add more detail.
Two small hilt profiles were added and shaped with a power sander to help round out the hilt. A small pvc ring was added to the end of hilt to create more detail and provide a junction for the skull pommel to attach to.
Several plastic skulls from a Halloween store were cut and glued around a small diameter pvc pipe. Though time constraints didn't allow for pictures, the spike and hook that extend from the top of the skulls was cut and shaped from more insulation foam. It was covered with Bondo to add strength and to help smooth it out for painting.
A quick set of primer coats were sprayed over the sword and then the "juicy bits" were painted using various mixes of acrylic paints. The red gems were cast with Quick Water instead of resin because at the time I wasn't able to find a small enough quantity of clear resin. The basic effect was the same, and Quick Water can be dyed with food coloring which I happened to have some red lying around.
The blade was given a couple more coats of primer after I realized how much of the wood grain was still showing through. Primer, sand, primer, sand, ect.... The usual deal with blade finishing.

A few shots of the finished blade with my girlfriend in her custom Trish costume outside of the convention center for AWA 17/2011. See more of her great costume work at:


